Use video in your marketing? Here’s how to add closed captions to your videos for all the main social media channels: Facebook, LinkedIn, YouTube, Instagram & Twitter.
We have all been there. Sitting in a bus or train when our blissful state of chill is blasted with the sounds of someone’s Facebook cat video. You can hear the collected hissed intake of breath when they settle in for a full commute filled with the sounds of annoying birds and spitting llamas.
In our noisy world, people crave silence.
How much silence? When Facebook introduced silent autoplay of videos, 85% of all videos were watched with the sound off.
And yet, we also crave videos!
We have also all been here. Finally settling to catch up with the doings of some of our favourite businesses on social media over an excellent coffee at the local coffee shop, but not being able to hear what the video is saying over the chatter and clattering of cups.
People are consuming more and more videos each day
Video accounts for 78% of the world’s mobile traffic.
According to Hubspot, 53% of consumers want to see more video from the brands they support.
Video is consumers favourite type of content on social media, according to Animoto.
How do you work within this paradox?
Unless you want to crank your silent miming game in your social videos, you need to add captioning or subtitles to your videos for Facebook, LinkedIn, Twitter, YouTube, Instagram (and whatever other social platforms gain prominence).
The side benefit of adding in captioning to your videos is you are also helping the 1 in 6 Australians with some form of hearing loss (estimated to rise to 1 in 4 by 2050).
What is Closed Captioning or Subtitles?
Closed captioning is showing a transcription of the text of what is being said on screen and can include non-speech elements like music or sound effects. Closed captions assume people can’t hear.
Subtitles assume people can hear the music or sound effects, and just need to translate or read the words of what is being said, so only includes the transcription of what is being said on screen.
Closed captioning or subtitles can also be used to show translations of the dialogue, but we won’t be covering that aspect in this post.
There are two different types of captioning – closed or open.
Closed captions mean they are not visible until the viewer takes action (e.g. muting the sound or toggling to show captions).
Open captions mean they are ”burned into” the film and open to everyone
A Basic Closed Captioning Workflow
Recently I have been given the right royal kick up the butt to get more into creating video content.
Like all things I do, I like to do my research about what to do, and how to do it more easily and quickly.
If I do something more than once, then I prefer to have a streamlined system to get everything working smoothly (and preferably to be able to do most things on the fly, rather than being chained to a computer).
A basic workflow for a prepared video:
- Create your video
- Edit your video to delete mistakes
- Create your captions (we will talk about how in a minute)
- Upload your video to your social media
- Edit your video to incorporate captions
A basic workflow for a live video:
- Create your live video
- Create your captions by sharing the link to the URL
- Edit your video to incorporate the captions
There are more complex set-ups if you want to caption a live stream in real-time, but they involve third-party providers such as Ai-Media or Telestream, CaptionSync and are out of the budgets of most small businesses.
Step 1: Video Creation
Creating a video used to be something mystical and complicated. Now, if you have a smartphone, you have pretty much every tool to create decent videos for social media in your hand. Most smartphones have the capacity to film videos baked natively into their software.
Working out “what to say on video” is the bit I am still working on for my business, and will be doing some more training over the next few weeks to polish to my video creation skills.
Step 2: Video Editing
Everyone flubs a line every now and again, so editing helps to tighten up those “um” moments.
Smartphones have editing software built into their programs to greater or lesser degrees of finesse.
My current personal favourite app is linked to my Adobe subscription – Premiere Rush. Other apps include KineMaster (Android, IOS – Free/Paid), iMovie (iOS – Free) and FilmoraGo (Android – Free).
Editing is needed if you want to add in intro’s and outro’s to your video clip.
I created my own intro/outro clips for my Tip Tuesday videos by creating a background image in Canva (I used a PowerPoint presentation 16:9 ratio), found a fabulous royalty-free music clip (6 seconds long – I use Audioblocks) and put the two together using Premiere Rush and saved them both as clips to my camera roll so I could use them whenever I need.
Step 3: Creating Your Captions
Gone are the days of sitting with a headset on and laboriously typing back each of the words you said in a recording: Technology to the rescue!
There are a number of cloud services and apps that turn your speech into text for you.
Temi – 10c per minute. This is my pick of transcription services. While not quite as accurate as other options (my name and company name was hilarious in the transcriptions), editing was super simple and the export and import into social media easy and accurate. It was also lightning fast – it took only as long as my video took to play.
Rev – $1 a minute. Transcribed by humans, so it takes a few hours but is more accurate.
Otter.Ai – Designed primarily for transcribing live meetings, but you can also upload videos. 600 minutes free transcription per month. I had problems with importing the file into Facebook (even though the file was correctly coded) , so it lost points from me as a result.
Getting your film transcribed
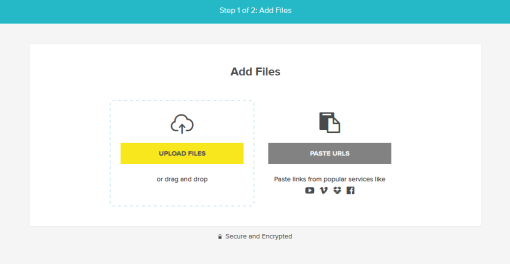
How transcription services work is you either upload your whole video to the service, or the URL where the video lives.
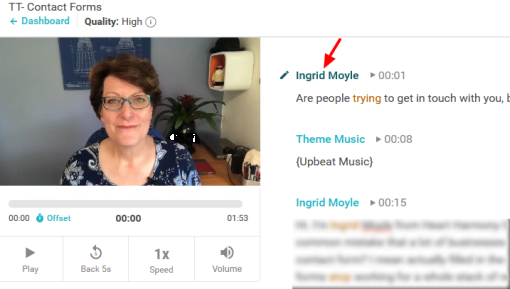
Temi’s service then converts the video into a text document for you to review.
You then edit the name of the speaker (speaker 1 to Ingrid Moyle) by clicking on the word and then correct any mistakes as well as any major speech flubs and sound effects.
You then download your files by clicking Export.
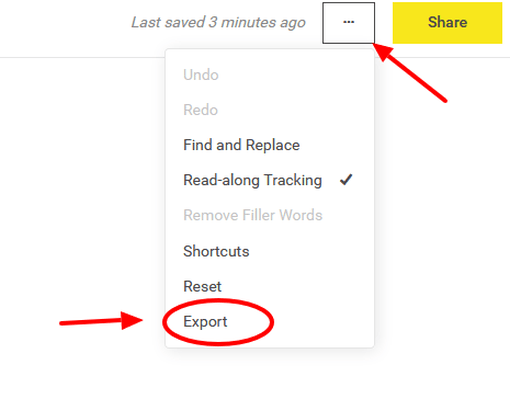
I recommend downloading your file as both a Word doc (because you never know when you need the full transcript) and an SRT file.
What is an SRT File?
SRT files or SubRip files are plain text files that contain not only the words that you said, but the timing of when you said them. They match the pace of your video and when blended with your video, create the captions.
Step 4: Upload Your Video to Social Media
In most cases, uploading your video to social media is as simple as doing a regular status update.
Step 5: Add Your Captions to Social Media
This is where the magic (and difference between platforms happens).
Adding Closed Captions to Facebook
Facebook REALLY wants you to add captions to your videos, so much so that it has free artificial intelligence closed captioning built-in.
Once you have uploaded your video to Facebook, either click Edit (if it already has fully uploaded or you have already shared it to your page, or the Subtitles and Captions tab if you are uploading fresh.

You then need to make a few selections:
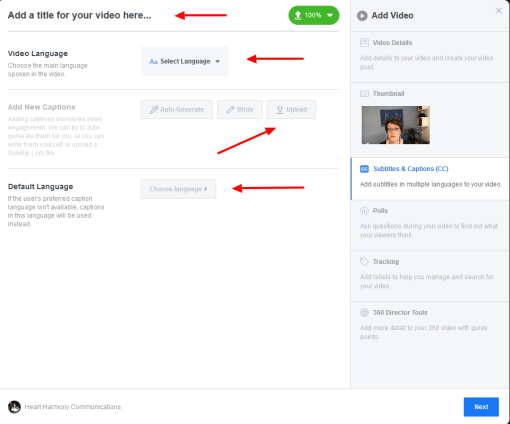
Add your title (if you haven’t already added it)
Select the language on the drop-down (and no, they don’t have English – AU)
You can use Auto-Generate if you like editing files or if you didn’t get captioning done in a previous step. (I only like to do things once, so I don’t use this option – and yes, I become Ingrid Mobile or Ingrid Mile thanks to Facebooks’ AI).
If Facebook has automatically generated captions for you, just hit the cross next to them to delete them.
Then choose the Upload option.
Being Facebook, they have to do things their own way, so you need to do a quick rename of your SRT file before you can upload it to Facebook. They require your file name to follow specific naming conventions.
Let’s make that horrible list easy.
If your file is currently named myvideo.srt click your rename option on your computer and rename the file name to myvideo.en_US.srt
You are merely adding a .en_US at the end of your filename (and yes – the full stop matters). Don’t do anything else if you want your closed captions to be in English (US).
Then hit the Upload button.
Finally, choose your default language and click Next.
To see your closed captions in action, theoretically press play on your video and mute the sound.
Being honest – I have yet to get the CC to display in a preview screen. It has only been visible for me when I do it on a published or scheduled post.
A few things to remember for Facebook Videos:
- Facebook likes videos over 3 minutes.
- Remember to add your title, description and hashtags
- Choose your thumbnail by clicking on the thumbnail tab (no more half-open mouths or strange looks on your face).
Adding Closed Captions to LinkedIn
Adding captions into LinkedIn videos is super simple and a great way to enhance your profile. (Here are more tips on enhancing your LinkedIn profile.)
Click on the film camera in your status update box and upload your video.
Once uploaded, click on the Edit button.


Select your SRT file and click Save.
A few things to remember for LinkedIn Videos:
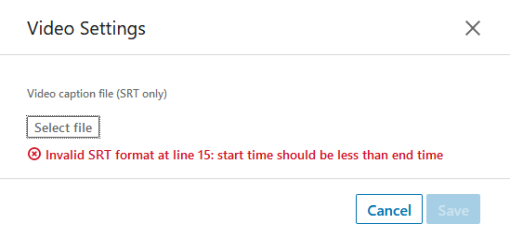
- My only problem with Temi transcriptions and Outro music is it only records the beginning of the music time and not the end. This means it throws an error if you upload the file exactly as you get it. If you get the error, “Invalid SRT format at line 55: start time should be less than end time” you need to open your SRT file in your Notepad app and tweak the timings on that line.
- You won’t see your captions until the post is live.
- LinkedIn captions are open captions, which means everyone sees them.
- The captioning box is enormous and covers almost half the screen, so you need to frame your shots with your eyes at or above the top third line if you want to be seen.

Adding Closed Captions to YouTube
YouTube only has the ability to add in closed captions with the Creator Studio Classic view and not the Beta Studio view, so you need to make sure you are in the classic view.
Start by uploading your video.
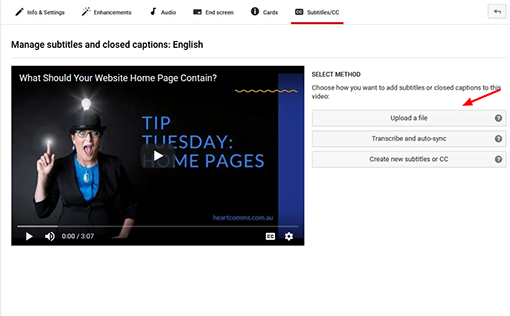
Once it has uploaded and been published, click on Subtitles/CC.
Then click add new subtitles/CC and choose your language.

Next, you need to upload the handy SRT file you prepared earlier.
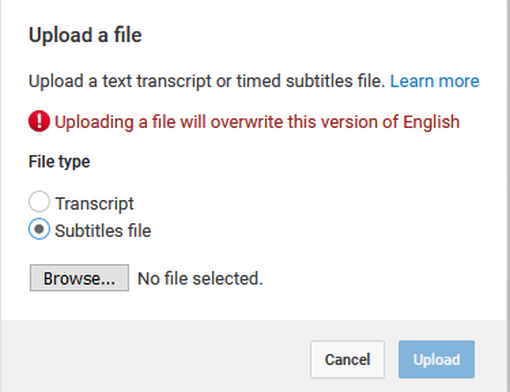
Choose “Upload a file” and tick subtitles file (and ignore the red warning).
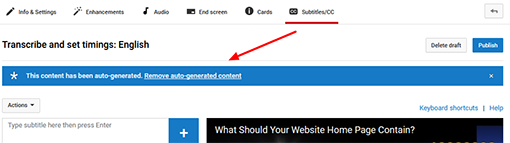
Click publish.
You may find that YouTube has also autogenerated some random subtitles in addition to your SRT file – and if you are like mine, they were pretty mangled. Delete them!
Make sure you have saved everything and then check your captions are working by clicking the CC in the YouTube controls.
Adding Closed Captions to Twitter & Instagram Videos
Twitter and Instagram have different time requirements for videos, so you are not likely to be able to use the same video clip that you did for Facebook, LinkedIn or YouTube.
Twitter videos – Maximum of 2 mins 20 seconds
Instagram videos – Maximum of 60 seconds
Twitter and Instagram also haven’t yet understood the importance of accessibility on the web, so the only way you can get closed captions on your Twitter or Instagram videos is to burn them into the film itself before you upload them.
To burn them in, you need a different app or software. Unfortunately, none of the apps I mentioned before to edit the films allows you burn in the subtitles.
I have been using Adobe Premiere Pro to burn in my closed captions, which feels a bit like using a flamethrower to swat a mosquito (and with similar cost). If I find any other cost-effective options, I will let you know!
Left Field Option – Clipomatic App (iOS – Paid)
In looking for Instagram caption options, I came across an iOS App that adds captions to your chat for up to a minute – Clipomatic.
If can “wing it” for up to 60 seconds at a time and don’t want to fiddle or edit your clip, then try out the Clipomatic App. It has real-time subtitling as you speak (not closed captioning), and you can film in square or full format.
With Clipomatic, you can change the speech bubble and font style, as well as change your filters for moody effects.
All you need to do is press record and speak clearly. (It works best in a quiet room)
When you finish recording, then click on the speech bubble to make any edits to the text, then click Save.
You can then share your film to Messenger, Instagram or Facebook from directly within the app.
For those control freaks like me, you can still save the file and then edit it to remove the fumbling pushing of buttons at the beginning and end. (I am learning to fumble – then leave a pause before speaking so I can edit, and then at the end repeat the pause before fumbling. I then edit the fumbles out).
This is a super way to do a quick update to people and has been picked up by US politician Alexandria Ocasio-Cortez as a way of making her Instagram Stories updates more accessible.
For me, while it is a great option for Instagram videos, it is also a fantastic way to send a birthday message to a friend/colleague (a lot more personal than a “Happy Birthday” note on Facebook or Messenger), or a quick welcome note to new clients/buyers. It’s worth exploring the possibilities for quick ways to be inclusive in your marketing.

Last thoughts
Making your business marketing videos more accessible through adding in closed captions not only makes it easier for busy people to engage with your message, but it also helps people with a hearing impairment to access your content.
With the number of apps and services that now deliver captions quickly and at super affordable rates, there is no excuse not to add in captioning/subtitles to your videos.
Give it a go. Who can’t afford to get access to more potential clients by taking just a couple more minutes with their marketing?